Thursday, November 18, 2010

New Scav Alert, Part 1: Tis the season... Cheap Trees!!

Tis the season for Christmas decorations. What does that mean? Beautiful evergreen trees that would normally cost a lot more can be gotten CHEAP! I ain't kidding. Because if you're like me, Zombies are like trees, you can never have enough!! 

This was actually an accidental find. Whilst perusing up and down the aisle of my favorite dollar store one day looking for gaming supplies, etc. I noticed the proliferation of Christmas themed decorations. Miniature buildings, lamp posts, carolers, cheesy train sets, etc. And... "What's this? Hello? Are those... What the...? Hey! They have evergreen trees here!" I almost shout like a maniac.

Blister packs for a BUCK each!?
Note that there are actually two more styles of 
pure white
(which I didn't get b/c they're not my preference) and another
style of tree that flocked as well.

They were packaged two to a blister and only, GASP! for a fricken dollar. Do the math: that's 50 cents a tree. "Woohooo!"

Needless to say I loaded up and cleared out their display. I've since canvassed Houston for Dollar Trees in my area and have alerted my buddy Willy (aka LTL Dad, Sturmflieger, Veloci) the man with many names. Fear not, fellow scrounger and scavenger, Houston's big and there're a few more stores that I didn't hit so go out there and get some before some knucklehead buys up the stock.

Dollar Tree
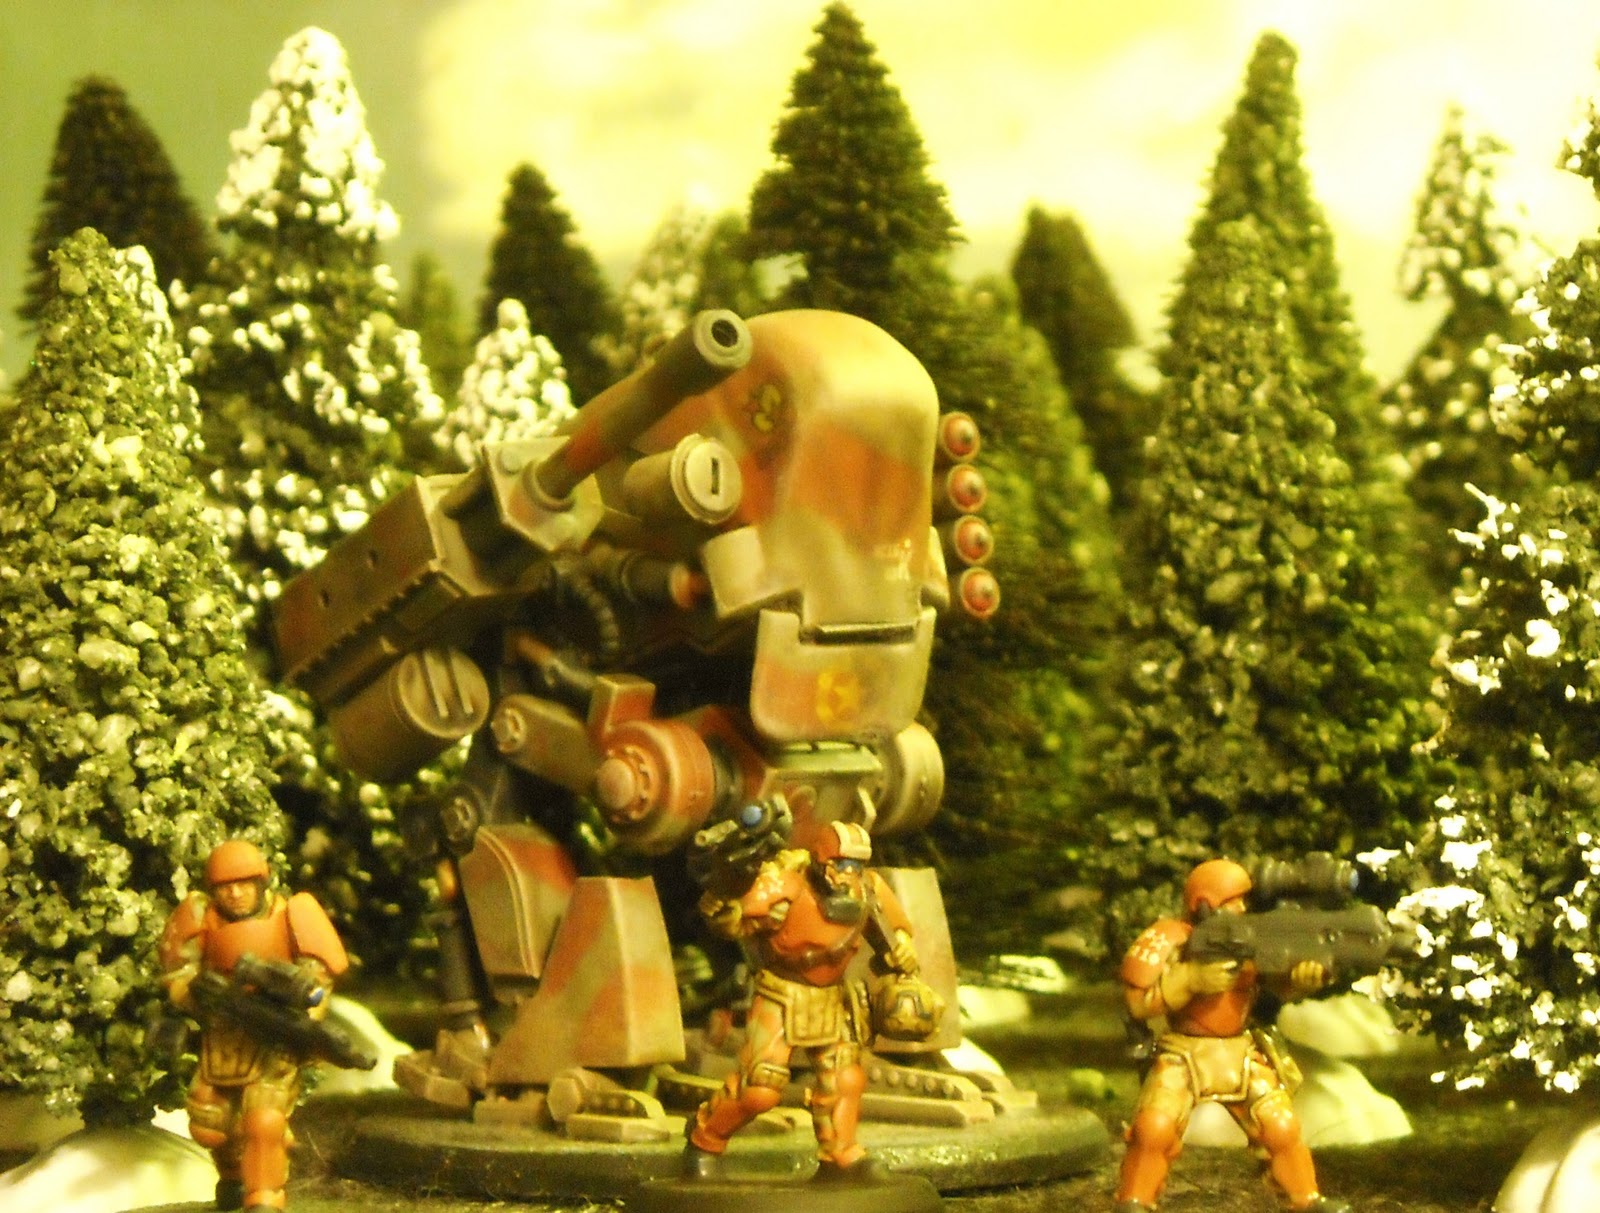
Unpacked right outta the blister and ready to go.

My forest setting.
Looks good with an AT-43 Red Blok mech, no?


So what are ya waiting for? Go get some!!

Tuesday, November 16, 2010

BTD Collection Part 1: WW2 Soviet Infantry

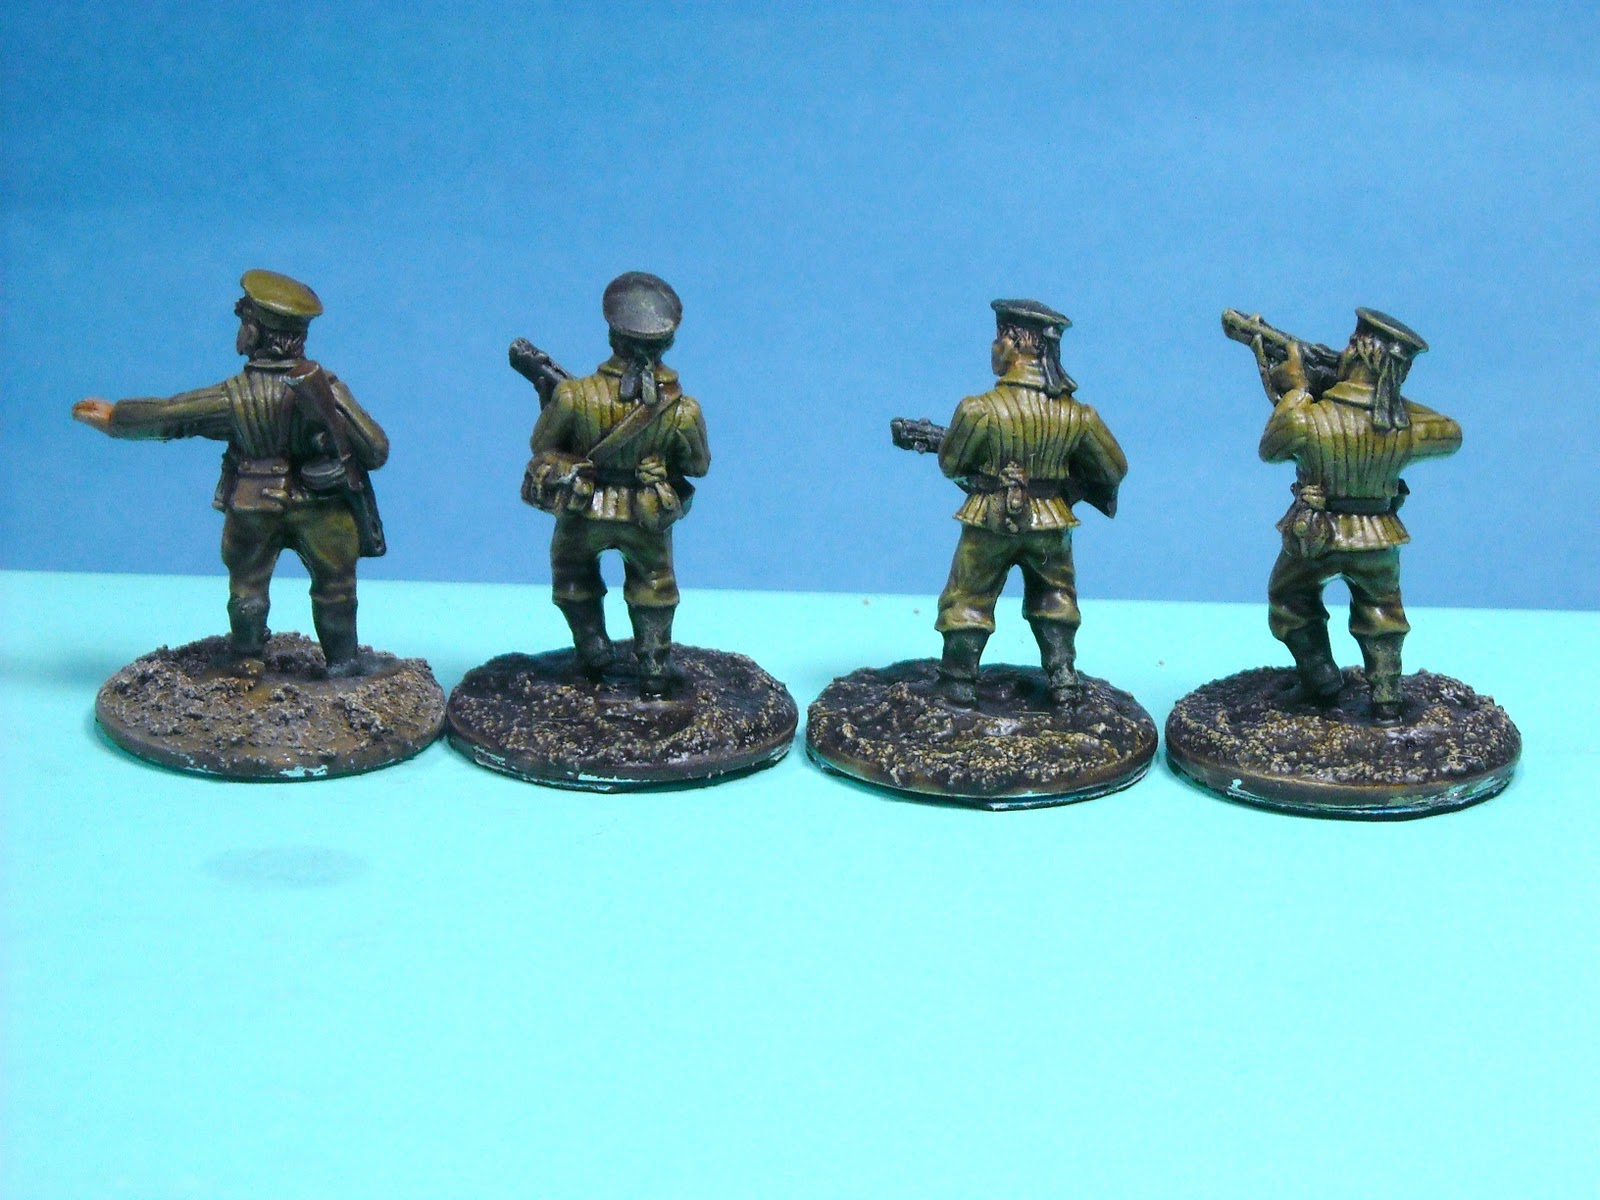
Whilst waiting for another episode of the ill fated MI I've decided to post my ever growing collection of the excellent BTD (Black Tree Design) line of WW2 miniatures. First up are the Soviets (of course).


(click on the pix to enlarge)
Soviet NKVD Maxim Teams  


Soviet Sailors (need to get more of these bad boys)


More Strelkovy coming next...

Monday, November 15, 2010

Bolsheviks

A while ago I acquired some excellent Copplestone Castings of Bolsheviks for the purpose of gaming WWI (another romantic era I dabble in). Initially, I was captivated by Warhammer's Historical rules.  


Warhammer Historical Wargames: Rules for The Great War

I mean what's not to like? This is a beautiful rules book filled with great colored photos and maps that's truly inspiring and scenarios I'm itching to try. It's also a great painting reference and a must for any collection. 

However, I haven't tried this game since I've only completed a small unit without opponents. Now I'm thinking of using Flying Lead from Ganesha Games because of their simple but effective mechanics for skirmishing with no book keeping. But first I need some opponents (Germans, White Russians, Turks), a few additional units (I'm thinking 10-15 rank and file) and armored cars/vehicles (Copplestone has excellent models) for a small skirmish. 

From their Back of Beyond line: Bolshevik Officers and a Bolshevik Elite MG Team.


Dasbedanya!

Sunday, November 14, 2010

Mobile Infantry (MI) Adventures

Ever since I saw ComicLife used on batreps I knew that I'd have to give it a try. 

Here goes...


Saturday, November 13, 2010

Taking Incursion out for an Excursion

After months of patiently waiting, my Incursion board game finally arrived at my FLGS (friendly local gaming store). I can't say enough about this game and couldn't wait to play it. So I sat down and whipped up some quick terrain for that added dimension. Luckily I acquired some pre-painted Nazi Zeds supplemented by more Zeds that I painted from 'Last Night on Earth'. More Zeds are on order b/c Zeds are like trees, you can never have enough. With the plethora of figures in my collection I truly abhor populating the corridors with the cardboard counter standups that come with the game. I'd rather proxy in the meantime as I patiently wait for the official minis.

(click on the pix to enlarge)
Table setup during a game.
The beautifully designed and printed board with my walls complement each other well. This should do for a start. 
I've decided to add more details and embellishments for the wall sections I'll create for the other side of this board.

Close up of the rock and concrete wall. Here's a U.N.A. Steel Trooper (to simulate an APE and to fit) fighting off the different Zeds in my menagerie.
"Whose knocking?" Recognize the Red Blok trooper on the other side of the door? 
Zeds sneaking up on a trapped trooper.
More action in the hallways!

DIY (do it yourself) aka handmade Objective Markers. Left to Right: Doomsday Machine, Zombie Pinger and Caved In markers.
Concrete wall section with detailing. For my second generation of my wall sections I decided to add some detail now that I've got the basic texturing down. I mostly use bits from my bits box since I practically save everything. AT-43 trooper and Zed from 'Last Night on Earth' are here for scale. In the boardgame, this would be a 3 square long wall.

Here's another 3 square long concrete and 2 square long stone wall with a UNA TacArm. Another idea was to give different profiles to the concrete walls for future addition of details such as pipes, panels, etc. 
Dr. Hugo Von X (he isn't really the official mini b/c Grindhouse didn't have one of him - just my stand in) on the right and his Zombie Pinger.
Dr. Hugo Von X on the right with his Doomsday Machine.
Finally, a lone trooper about to be swamped and be Zombie chow.
My game board is next and I've decided to go with 2" squares for more room. These walls are 1 1/2" thick and 2" high with the length corresponding to the number of squares on the board.


Painted APEs, SturmZombies, Gretl, MI-13 and the whole cast of characters will be featured in an upcoming post.

Wednesday, November 10, 2010

Micro Armor / Board Game Conversion Terrain Components, whew!

Long title, I know, but I've decided to post this explanatory post regarding terrain components I use for my micro armor / board game conversion to answer multiple questions I've been getting from different forum groups.

Here goes...
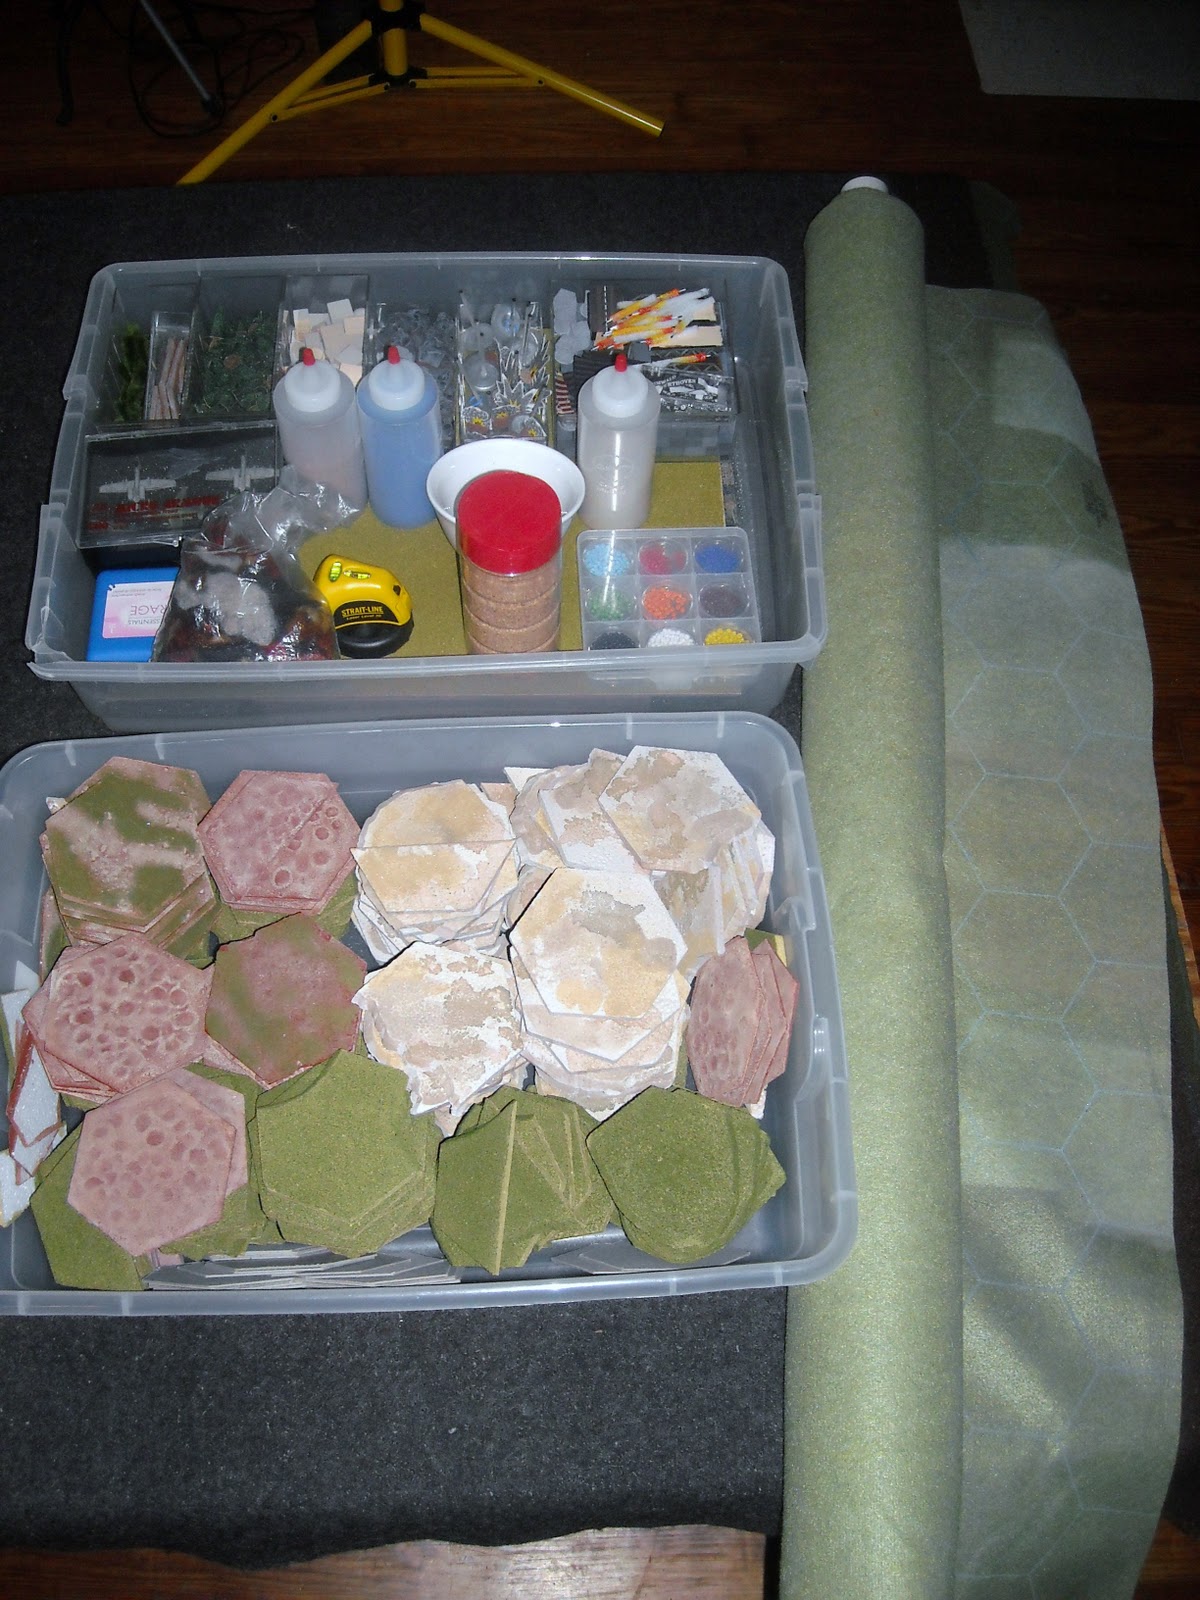
Everything I need (and carry) to fit on a 4'x6' table and run a game. 
Here's an assortment of blocks, trees, colored beads (as gaming aids since I abhor using counters if at all necessary), colored sand, etc. I recommend getting a leveling laser for determining LOS. 
I used GHQ Terrain Maker hexes cut down to 1/8" thick to better simulate rolling hills proportioned for micro. Note the different colored hexes: green for Euro and variegated sand color for Mid East. I had to create additional terrain hexes as well to represent cratered areas in the Blood and Bridges map. These hexes where cut to about 1/16 thickness and I used a slurry mix of white glue, sand and paint to simulate the craters. Base coat and dry brush for visual effect. 
City Components: loose 3/4" and 1/2" blocks, spray painted gray for generic urban / town setting.  Beige / sand colored blocks are used for Mid East scenarios (see below)
Standard gray chip board cut to match hex, this represents hard paved areas such as concrete and asphalt, note the absence of streets, etc. The plainer the better.
Evergreen trees were the easiest form to represent especially for generic European settings (as the current World at War system is based on). Trees on the left were handmade by my buddy Justo (aka Uncle Greasy, another consummate gamer par excellence) and are free standing. Trees on the right were from GHQ Terrain Maker as are the hills (which I've cut to 1/8" thickness).
Scratch built trellis bridges - more cost effective for me especially since I need a few of these buggers (8 minimum) for the Blood and Bridges map. Lotsa river crossings!

My interpretation and answer to modeling Middle East towns. Any guesses on how I constructed the minaret? Hint: they're all initially separate pieces. I've used these in a couple of Arab-Israeli scenarios included in the World at War Compendium along with a desert Hotz Mat (which is too plain vanilla and I'd have to modify color-wise - look for that upcoming post) and Terrain Maker hexes.
Put 'em all together and Voila!

Infantry platoons fighting from town hexes. Roads: sand, Rough hex adjacent to town: lizard litter; Fields: print fabric
Bottom line is that I use my imagination when perusing the aisles of any craft store. I'm always on the lookout for anything that can simulate real life prototypes on my gaming table. There are plenty of generic materials ready made that can be used to enhance our gaming tables for maximum eye candy without spending a fortune.


On to more gaming...

LinkWithin

Related Posts Plugin for WordPress, Blogger...