Wednesday, November 10, 2010

Micro Armor / Board Game Conversion Terrain Components, whew!

Long title, I know, but I've decided to post this explanatory post regarding terrain components I use for my micro armor / board game conversion to answer multiple questions I've been getting from different forum groups.

Here goes...
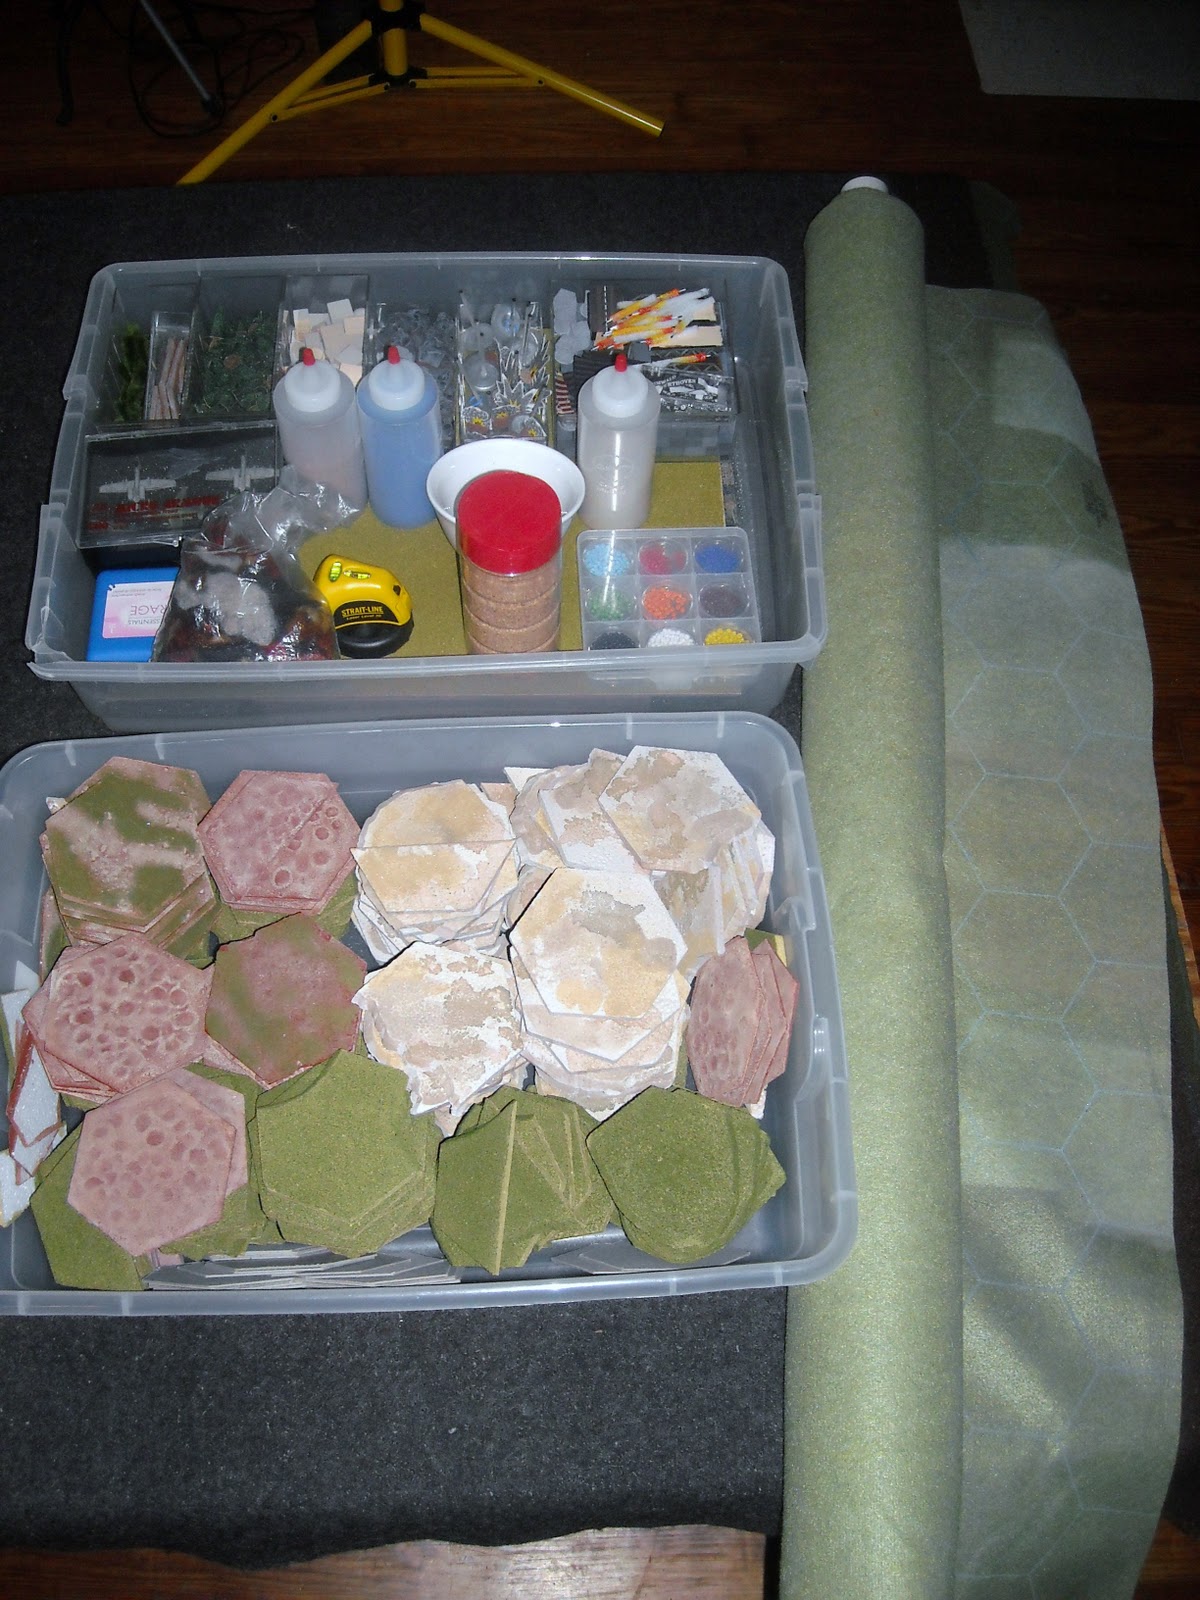
Everything I need (and carry) to fit on a 4'x6' table and run a game. 
Here's an assortment of blocks, trees, colored beads (as gaming aids since I abhor using counters if at all necessary), colored sand, etc. I recommend getting a leveling laser for determining LOS. 
I used GHQ Terrain Maker hexes cut down to 1/8" thick to better simulate rolling hills proportioned for micro. Note the different colored hexes: green for Euro and variegated sand color for Mid East. I had to create additional terrain hexes as well to represent cratered areas in the Blood and Bridges map. These hexes where cut to about 1/16 thickness and I used a slurry mix of white glue, sand and paint to simulate the craters. Base coat and dry brush for visual effect. 
City Components: loose 3/4" and 1/2" blocks, spray painted gray for generic urban / town setting.  Beige / sand colored blocks are used for Mid East scenarios (see below)
Standard gray chip board cut to match hex, this represents hard paved areas such as concrete and asphalt, note the absence of streets, etc. The plainer the better.
Evergreen trees were the easiest form to represent especially for generic European settings (as the current World at War system is based on). Trees on the left were handmade by my buddy Justo (aka Uncle Greasy, another consummate gamer par excellence) and are free standing. Trees on the right were from GHQ Terrain Maker as are the hills (which I've cut to 1/8" thickness).
Scratch built trellis bridges - more cost effective for me especially since I need a few of these buggers (8 minimum) for the Blood and Bridges map. Lotsa river crossings!

My interpretation and answer to modeling Middle East towns. Any guesses on how I constructed the minaret? Hint: they're all initially separate pieces. I've used these in a couple of Arab-Israeli scenarios included in the World at War Compendium along with a desert Hotz Mat (which is too plain vanilla and I'd have to modify color-wise - look for that upcoming post) and Terrain Maker hexes.
Put 'em all together and Voila!

Infantry platoons fighting from town hexes. Roads: sand, Rough hex adjacent to town: lizard litter; Fields: print fabric
Bottom line is that I use my imagination when perusing the aisles of any craft store. I'm always on the lookout for anything that can simulate real life prototypes on my gaming table. There are plenty of generic materials ready made that can be used to enhance our gaming tables for maximum eye candy without spending a fortune.


On to more gaming...

Friday, November 5, 2010

Mobile Infantry (MI) - at last!

Comic book cover


Whilst working on numerous projects (e.g. weathering of recently acquired AT-43 mechs and infantry, Bugs!, rubble / ruins, Gladiators, Mongols, more WW2 Strelkovy, Waffen SS, etc.) a small squad of MI (seven of 'em) were there patiently waiting to be next on my work bench. They weren't really yelling or nagging me to finish them but I kept glancing their way and knew that I'd have to get to them eventually. 

When I got the box game of Starship Troopers a few months back for my bday present to myself (see my earlier post: http://thehistoricalminiaturist.blogspot.com/2010/06/bugs-for-my-bday.html), I quickly spent a few days feverishly putting together 20 Bugs and this small contingent of MI. I even took some of these pix back then in anticipation of this post.

Truth to be told, I was a bit overwhelmed when I opened the box and saw all them pieces. But after putting together the Bugs, I decided to just assemble a small squad so to show the disparity of numbers portrayed in the book and movies. Actually, I was just burnt out with the tedious assembly process. Which is another reason why I collected the prepainted AT-43 figures, but that's another post.

Standard cap trooper with Morita Assault Rifle

Hard plastic and really good sculpts


Some more cap troopers and one with a
kneeling pose armed with a Triple Thud Grenade Launcher and holding a frag grenade

I've been using washers to base all my minis now especially plastic b/c I love feeling the weight of a figure.

Yet another cap trooper and one with a Javelin Missile Launcher


Voila! Here they are, painted, loaded for bear and ready to rock n' roll. "Where dem Bugs?":
Juan Rico and his Roughnecks

BTW, the figure on the left is holding a CC-176-ER Shock Stick (aka electrokinetic combat prod which doesn't seem practical when fighting with giant Bugs! since they'd have a longer reach than the stick length - but that's just me)


Oh boy! Now I can send 'em on an adventure.

Bugs! Part 3

In my never ending bounding around from period, genre, project, game, etc. I feel more like Dug from 'Up' chasing the proverbial squirrel.

Ahem... so to continue here's the progress of my Bugs! project. Incidentally, I finally finished my Mobile Infantry but haven't made the time to post. 

Bugs! in various stages of completion. (from Left to Right columns): Column 1: coloring complete and ink washed and ready for final matte coat; Column 2 top: final black color awaiting accent (red and yellow);  Column 2 bottom - Column 4: base color coat; Column 5: 2 coats of dry brush: dark and lighter gray   

Detail of base color coated and dry brushed

Detail of completed and ink washed Bug ready for final matte coat and Bug awaiting accenting.
 I experimented with black and brown ink washes and found the brown to be more to my liking. Next, I'll do some test shots of a diorama I'm putting together with the Mobile Infantry. Look for some cameo appearances...


Tuesday, October 26, 2010

World at War: Blood and Bridges, Scenario 5: Hold the Line


In preparation for an upcoming local con here in Houston (MagCon 2: http://mag-con.com/) I've set up my game table for a scenario from the stand alone module Blood and Bridges from World at War. I posted a couple of scenarios from the first game Eisenbach Gap and needless to say, I'm hooked. The cool thing about this the great fun I have converting flat 2D maps to micro terrain on my table. Funny thing about me is (and Willy aka LTLDad can attest to this) that as soon as I complete my project goal I'll set it aside and start another project. Ahh, go figure. Us gamers are an ADD riddled lot. 


At any rate, Blood and Bridges is best described in this Boardgamegeek review: http://boardgamegeek.com/boardgame/35035/world-at-war-blood-and-bridges. Simply put, this a platoon based game with a vehicle representing a platoon of 5-10 vehicles. 


Here's a portion of Blood and Bridges map per the scenario special rules recreated on my game table. I used colored sand to delineate the roads (beige) and rivers/lake (blue). Trestle bridges are scratch built along with the pine trees (by Justo). Since BnB is a continuation of WWIII action started in the Eisenbach Gap, additional terrain features have been added: burned crops, craters, shattered forest and city ruins. 
Map orientation with north being top of the page. This scenario calls for the a defensive action by Brits without the aid of their MBTs. Victory conditions for the Soviets is to take Anhausen (4 town hexes) located on the northwest corner of the map.
In this corner: the Brits. Top right group: Elements of the Royal Lancers with a platoon each of a Scimitar and Striker. HQ is represented with a Scimitar model marked with an "H". Bottom right group: Elements of the 3rd Queen's Regiment featuring a FV432 transport platoon, a Scorpion, an FV438 Swingfire with two Infantry platoons plus a Milan ATGM support weapon. Left group: 2x Lynx helos.
And in this corner: the Soviets fielding the 74th Guards Tank Regiment. Top left group: 7xT80, a single SA13 Gopher (proxied by an SA9 Gaskin), 3x BTR70 and 3x Infantry with support weapons: a Spandrel and SA16.
British FV432 APC 
British Milan ATGM

British FV438 Swingfire ATGM
British Scorpion Light Tank
British FV107 Scimitar Light Tank
British Lynx

Soviet Spandrel ATGM
Soviet SA-16

Soviet SA13 Gopher
Soviet BMP-2 APC
Soviet T80 MBT
Now that the stage is set and the players are in place let the firing commence and the battle begin. Batrep to follow.

Friday, October 22, 2010

More Ruination

The thing about skirmish games I've found is that you never have enough cover for your troops when attacking. So to supplement my urban ruins for the Stalingrad, etc. the need for additional rubble piles are constant. Here I am again making a few more.  I've learned a few things from my earlier forays to short cut and get better results.  
(click on the pix to enlarge)
Raw materials: standard blue (or pink) insulating foam and packing foam from appliance boxes 
Rubble mix: cat litter and lizard litter. Incidentally, cat litter is a friable material and can be bashed with a hammer for the random sized look. Simply place a scoop (3-4 Tablespoons) in a zip lock bag, bleed out the air and start bashing. Result: powder, granules and aggregate in differing sizes. 
Completed wall sections using scrap foam pieces on foam base with white glue.
The all important prep step using sprayed on water.
Flocked w/ rubble mix, water downed white glue and repeated spraying in between applications 


Coming up: color application, painting and drybrushing.

Monday, October 18, 2010

Bugs! Part 2

After a short hiatus, I finally decided to continue the long arduous process of painting up my Bugs.  After assembly (which was another daunting undertaking in of itself) I left these bad boys alone for quite some time as I followed other pursuits and interests. If you're a gamer I'm sure you can relate.


20 complete Bugs! with my urban ruins as a backdrop.

Detail shot of the myriad poses.


Baby steps being the key, I spray black primer as usual. Then comes the drybrushing.  In this case I'm using a dove grey. 


Side by side comparison of black primered and drybrushed steps.

I do believe that this is one of the labor intensive steps because of all the detail these models have.


 1 down 19 to go. Then color's next. Stay tuned, loyal followers...

Saturday, October 2, 2010

Red Blok Unit from AT-43

I've always been intrigued with the human factions of AT-43. Namely the Red Blok and U.N.A. forces. Not so much the alien races. And what really caught my fancy were the mechs that the Red Blok units fielded. I think that my endless fascination with things Russian continues as my collection grows. Needless to say I finally got a hold of some and was pleasantly surprised. For prepainted miniatures Rackham has done an awesome job with applying enough weathering on their paint schemes to make their minis more battle ready as opposed to coming out fresh from the factory or parade ground. They're done with consistency as compared to the Star Wars and Hero Clix brands.

Here's a few shots of Red Blok unit out in the field as they deploy for a mission. Excuse the quality of some of the shots since the photographer had to get out of the way of the chaos of units getting ready for battle.

Spetnaz in the foreground with a Kossak mech in the background.

More Spetnaz interspersed with Kolossus min-mechs.
  
Nice detail shot of Kossak with medium missile launcher.

More Krashny Soldati with a Strielitz Kolossus with Col. Odin O-1 looking on.


Since I don't particularly like learning this rules set I'll be using these bad boys against my newly acquired Arachnids aka Bugs (from Starship Troopers) whenever I finish painting them and all other comers from various sci-fi game universes using the Chain Reaction system from THW.

LinkWithin

Related Posts Plugin for WordPress, Blogger...