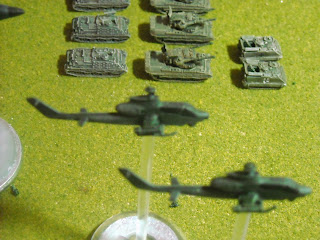
I'm done with all the microarmor and am now finishing up the rest of the air assets needed to play the scenarios featured in the World @ War series of games that I own. In the past posts I've featured the Hind, Cobra and Tornado. What's on deck are the:
Welcome! With a historical premise, this blog quickly degenerates into miscellaneous trivia and other serendipitous tidbits regarding miniatures gaming that runs the gamut from historical to whacky to whatever-the-hell genre I’m into at the moment. "Squirrel!" I’ll populate this blog with eye candy and images to water the eye of any visitor whether an unsuspecting layperson or veteran miniature gamer. Please enjoy your visit and thanks for hangin’ out.
Monday, May 10, 2010
Saturday, May 8, 2010
New Kids on the Block, Part 2
I'm on a roll with the New Kids (Soviet Sailors and LMG Strelkovy teams from BDT; Al Qaeda shooters aka Durka-Durkas and Soviet Paras from DoW) and couldn't wait to continue. So after the black primer (hand painted) has dried it's time for some paintbrush bashing time!! (i.e. dry brushing.)
This step, IMHO, is critical because the right amount of paint is needed to give gradation to your figures. Thereby achieving really good depth as the base color is applied. I tend to use really cheap natural hair brushes because a) its inherent properties on how it applies paint to a figure and b) I literally tear up a brush doing so. WARNING: this is not for the faint of heart and be resigned to going thru a lot of brushes but the resultant effect is well worth it.
Just go down to your local hobby store and go to the clearance section for these brushes. Here in Houston I go to Texas Art Supply, Michael's and Hobby Lobby. And don't be afraid to cut them, either. They work better without a point and the brush length shouldn't be too long. Hence the modification. A flat, blunt edge is my preference as illustrated below.
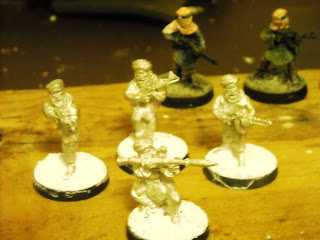
Soviet Paras sporting the stylish Balaclavas typical of most elite units.
Just go down to your local hobby store and go to the clearance section for these brushes. Here in Houston I go to Texas Art Supply, Michael's and Hobby Lobby. And don't be afraid to cut them, either. They work better without a point and the brush length shouldn't be too long. Hence the modification. A flat, blunt edge is my preference as illustrated below.
Left: brush right outta the package and before cutting. Right: point cut off for that blunt edge with either sharp scissors or exacto blade.
More Durka-Durkas that you can shake a paintbrush at.
One of my favorite Soviet units were the sailors. Many were sent to help the Red Army and were very colorful units, indeed. These reassigned naval forces took part in every major action on the Eastern Front such the Leningrad siege and the defense of Sevastopol.
Most of them kept they're signature striped shirts, if not their caps, as a unit and service identifier.
They were also featured in the movie 'Enemy at the Gates' in the scene when Khrushchev arrived via armored gun boat from across the Volga.
Pretty cool!
So, of course, I gotta have at least a four man unit. Alas, these sculpts didn't come with the cross bandoleers and fixed bayonet rifles but they'll suffice.
And last, but not least, are the Strelkovy LMG teams because you can never have enough fire power especially against the Germans.
Coming up, color...
Labels:
28mm (1:58),
Al Qaeda Fedayeen,
DoW,
Modern,
Nuts,
skirmish,
Soviet Paras,
Soviet Sailors,
THW,
Tips,
WiP,
WW2
Friday, May 7, 2010
WIP: New Kids on the Block, literally.
Got some stuff in the mail today and then I picked up some additional figs at Montag's. Since I'm on a painting binge I've decided finish up these projects while I have the time.
First up are four Soviet Sailors by Black Tree Design that'll go nicely with my Strelkovy. I must say that BTD has some really excellent sculpts. They're so nice they practically paint themselves.
Here are two additional LMG totting Strelkovy to supplement my existing force, again by BTD.
Speaking of supplement I acquired a few more Dogs of War packs from Montag's. The cool thing about DoW figs are that the Paras come with head and arms with weapons assortment so you can customize your squads. Which I'll feature in an upcoming post I've been working on.
Soviet Paratroopers
Love those balaclavas. Modern Soviet Ninjas.
Then I saw these figs and had to have 'em. They're generic Forward Observers and can be used by most modern armies. I'll use 'em as scout for my Soviet Paras.
Of course, let's not forget my Al Qaeda Fedayeen. They needed bolstering of their ranks since I only had four to start with. I picked up two more packs of four giving me a twelve man squad to fight all comers. Oooh, look, RPGs!!
Labels:
28mm (1:58),
Al Qaeda Fedayeen,
DoW,
Modern,
Nuts,
skirmish,
Soviet Paras,
Soviet Sailors,
Strelkovy,
THW,
WiP,
WW2
Thursday, May 6, 2010
My Modern Microarmor Collection so far
Here's my growing collection of microarmor specifically for use with the World @ War board game series that I've converted.
On the left are the Soviets, from left to right, 1st column: 11x T80s and 11x T72; 2nd column: 10x T64s, 5x T60s and 5x T55s; 3rd column: 10x BMP2s, 6x BMP1s and 4x bridging units; 4th column: 3x ASU85s, 8x BTR70s and 5x BTR60s; 5th column: 5x ZSU23/4s aka Shilkas, 100 ATG, 2x BRDM SA9 aka Gaskins, 2x BRDM2-AT, 5x BRDM-R and 10x Infantry.
On the right is NATO. Bottom group are West Germans of the FDR. 1st column: 2x Panzer Morser (self propelled 81mm mortar similar to US M106A1) and 5x Roland AAs; 2nd column: 5x TPZ1 Fuchs APCs and 4x Gepard AA; 3rd column: 4x Marders; 4th column: JagdPanzer Kanone and 5x Jaguars; 5th column: 4x Leopard 1s and 4x Leopard 2s; 6th column: 5x Merkava 2s of the IDF.
Middle group, US. 1st column: 4x Infantry and 81mm Mortars; 2nd column: 6x M109AA (converted M113 w/ vulcan); 3rd column: 6x M113 APCs; 4th column: TOW Jeep, 3x M106A1 and 2x Chaparral AA; 5th column: 5x M901ITVs; 6th column: 5x Bradley M2/3 AFVs; 7th column: 7x M60s; 8th column: 6x Abrams M1A1.
Top group, UK. 1st column: 4x Scorpions; 2nd column: 4x Scimitars; 3rd column: 4x Strikers ATGM, 4th column: 3x FV432 Trojans and 2x FV432 Mortars; 5th column: 4x Swingfires, 6th column: 4x Challengers.
Top aircraft row: 2x Hinds, 2x Cobras and a UK/FDR Tornado.
Bradley M2/3 AFVs
Abrams M1A1, Bradleys M2/3, M113 APCs
Tornado
Mil24 aka Hinds above BTR60s and BMPs
Mil24 aka Hind
FDR Gepards
BTR60 and BRDM Recon
ITV bushwhacking an unsuspecting BTR60
Labels:
6mm (1:285),
AFVs,
GHQ,
LnL,
microaircraft,
microarmor,
Modern,
Tanks,
WW3
Wednesday, April 21, 2010
Stalingrad: Building Ruins (an oxymoron)
Our everyday language is rife with them. You've heard them. Here’s some of my favorites: military intelligence, civil war, anti-missile missile, a just war, civilized warfare and deafening silence amongst others.
So when I started (here it comes…) ahem, building ruins for my 28mm Stalingrad table when that thought struck me. But I digress… I challenged myself in making these ruins from what I had available in my house. I’ve been sorely tempted into buying some premade ruins. But the scrounger in me was dying for a more creative and cost effective solution.
Rooting around my garage I found some spare 1/2" thick 2'x4' styrofoam ceiling panels. The rest of the materials I already had readily available: glue, straight pins, paint and assorted sizes of ballast such as fine pumice, colored sand, lizard litter and cat litter (in respective order from fine to coarse) for texturing.
Using a CAD program I was able to print out a section of a typical building story to be to scale with 28mm. From there I was able to cut pieces with my foam cutter of wall sections that I was modelling.
I was fortunate that the ceiling panel came textured on both faces. And being 1/2" thick, I knew that I had to thin it out to a 1/4" thick be to scale with my figs. You could see the speckled, cottage cheese texture on the wall face as well as the diamond pattern for the floor.
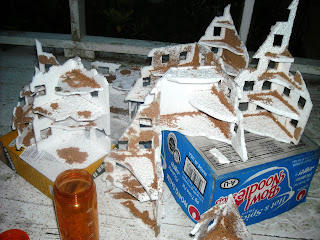
Here's the finished sections of ruins glued and textured with lizard litter. All fenestration (windows and doors) were cut with the foam cutter.
Latex paint was the first coat to protect the foam and to be followed later by different spray paints.
Here's a few rubble piles I'm working on. I'm using different size material and textures: pieces of foam cut from wall sections, popsicle sticks and different ballast as mentioned above.
After the latex coat has dried I sprayed with gray, olive drab and black.
On to drybrushing.
To be continued...
Labels:
28mm (1:58),
DIY,
Eastern Front,
Foam,
skirmish,
Stalingrad,
Terrain,
Tips,
Urban Ruins,
WiP,
WW2
Subscribe to:
Posts (Atom)


