Sunday, April 4, 2010

NScale Soviet Armored Trains

A few years ago before I got back to gaming I saw the much anticipated 'Enemy at the Gates'.  If you're not aware, this was a WW2 epic set in the battle for Stalingrad.  


I didn't like it very much from the plot standpoint and the typical Hollywood rendition however its only saving grace was the eye candy.  Thankfully it had a big budget and no expense was spared to create a believable and immersive backdrop for an otherwise lackluster story line.  It had great sets, cinematography and featured actual tanks and equipment.  What caught my eye was the scene in the beginning were a troop train was on the way to Stalingrad.  It made a stop to exchange locomotives and I was hooked.   

How cool was that armored train car! 

That was my first foray into MRR and I started doing research and discovered a whole new world for me to explore.  Here's a few examples of actual Soviet and German armored train cars used in various roles for the Great Patriotic War (WW2 eastern front).  This just barely scratches the surface and is just the tip of an immense iceberg of history, pictures and accounts of the war from the railroad perspective.

Recognize the T43 turret?


Armored trains have been around since the late teens up to the twenties of the previous century and was used extensively by both sides (Reds and Whites) of the Russian Civil War  during and after WW1.  Of course, the Russians weren't the only ones to use these monsters.


With all this colorful history, I knew that I had to start a collection but further searching frustrated my attempts.  I wanted miniatures and not models. Besides most models were larger in scale and only featured artillery rail cars.  


I had a feeling that this was a very specialized field of interest and I had to narrow my search.  I also preferred Nscale (1/160) b/c of its close proximity to micro (1/285) aka 6 mm.  Although Zscale (1/220) is closer it is more rare than Nscale harder on my aging eyes.  

You guessed it. Z scale is the tiniest of this lot.

So here's my collection of Nscale armored train cars and locomotive I had commissioned a few years ago by Ncentrities (a skilled modeller specializing in obscure military trains and models in other scales) while I was still in my 'wet Egyptian' phase. You know, "in denial." 


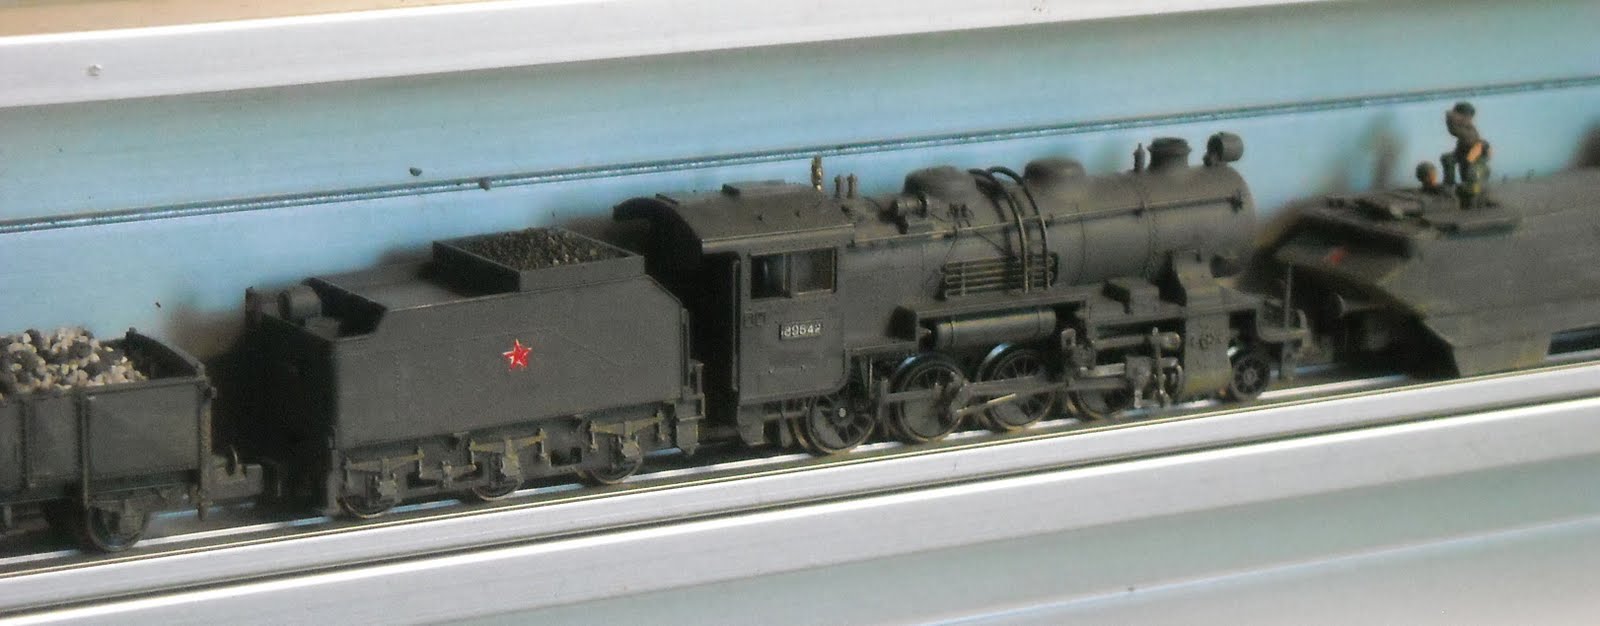
I'm so glad I finally got them out of storage and here's a few posed shots for fun.

A much needed load of lend lease matériel
and T34s on the way to the front.

Another mission for the Fallshcirmjagers.


Saturday, April 3, 2010

More Mid Republican Romans

One of the cool things about FoG that was never reflected in Tactica (another rule set popular in the '80s) was the baggage camp.  The Romans being who they were used fortified camps.  FoG allows you a 40mm x 80mm area to represent this.  I ordered the Roman Fort and tents from Baeuda.  The small area allowed some parts of it to fit quite nicely in this camp stand.


It looks empty so posed in context and populated with some units will breathe some life to this plain camp.  Here's the camp manned and guarded by Italian Allies with Numidian elephants (which are still one of my favorite ancient units) and Light Cavalry.


Meanwhile two squadrons of the Equites ride by in column on the way to the battle line.

And let's not forget the generals: Consul Scipio Africanus and his two subordinate commanders: Crismus Bonus and Nefarious Perpus.


Friday, April 2, 2010

100 Years War French circa 1415 for FoG

Here's my other Field of Glory (FoG) army that finally saw action recently.  The following shots were of a practice battle fought against Andy's English 'War of the Roses' Yorkists. 


My Generals complete with the famed Oriflamme flag (red).

The flower or the French nobility: Knights charging!


Mercenary Genoese crossbowmen with the sword wielding Brigans beyond raring for a fight.  Forgive the focus.  Still trying to get a hang of the darn macro feature.

The rest of my French foot in battle formation.  Baggage camp (subbing my fortified Roman Camp while my French camp is still on my work table) guarded by peasant rabble beyond (top of photo) - what else are they good for?

Bird's eyeview.  English in black.

Sometime later I finally got the camp done. Here's the rabble: the French dregs and assorted farmers along with monks guarding the camp and baggage train.

Ideally the camp should be located on high ground.  "Hey, Ewe, get outta the camp!"

And of course the King, his nobles and bodyguard surveying the battle.


Wednesday, March 31, 2010

Teaser and a break from Modern: Mid Republican Romans for FoG

Awhile ago (make that 2 years ago and some change) I got into Ancients again.  At that time FoG was a highly anticipated rules set to be published by Osprey and replete w/a plethora of recycled images from Osprey's extensive library.  

Since I use to play Tactica back in the day as my intro to Ancients and Medieval periods I thought I'd give it another try.

Here's a few shots of my Mid Republican Roman's (Scipio Africanus' army).

My Triarii (blue shields) w/ Numidian elephants and the Hastatii (green shields) in the foreground.

(click on the pix to enlarge)
Foreground: Hastati, background: Triarii

Hastati

Spanish Scutarii (allies) from Corvus Belli

Italian Allies Pedites Extraordinarii (white shields)
next to my Spanish with the Cretan archers in white tunics screening the front

The important but brittle Velites with the ubiquitous wolf's head


More to follow...


Friday, March 26, 2010

World @ War: Eisenbach Gap, Scenario 4: Maelstrom CONCLUDED


Turn 5 and 6 resulted in maneuvering: Soviets trying desperately to make their way north unmolested while the US are taking their toll on the lagging 1st Tanks and 33rd Motor Rifle.  1st Tanks is literally dead in their tracks.  The only effectives left are their recon contingent of 2 BRDMs, one armed w/a Sagger ATGM (right).  
Fire is exchanged between a Delta Abrams but Ivan keeps missing.  The Abrams fires back scoring hits but are ineffective b/c these units were concealed and under cover on a wooded hill.


The action resumes as Alpha’s Bradley calls indirect fire for the M106 (right) dropping HE on the 33rd's two thin skinned BMPs destroying them as they try to pass the Eisenbach gauntlet.


The rest of their company: 2 remaining T62 platoons and HQ (light blue bead) advance cautiously using all available cover, including the burning wreck of an Alpha Abrams.  They're safe for now.


Waiting for them patiently in Eisenbach is a mix bag of a Delta Abrams platoon supporting Alpha’s HQ and Bradley platoon.


Meanwhile on the west side elements of the 87th (2x BTR60s lodaded w/ 2x Infantry Platoons) take advantage and make a dash for freedom thru the thinly held line by Charlie Company.  Score 4 points towards the Victory Conditions for the Soviets.


However the rest of the 87th aren’t out of the woods yet.


In fact one of their valiant T55s got caught out in the open to be the sacrificial lamb covering his comrades’ advance.  He will be awarded posthumously.


Turn 9 finds the remnants of 1st Tank (2x T72 and HQ) able to rally and move towards the position recently vacated by the recon element who's moved into Bergengipfel.  However, it’s too close for comfort and the deadly sharpshooter Abrams from Delta takes them both out.
The Delta Abrams covering the right flank closes in to cut off the 87th‘s escape but misses terribly.  There’s hope for the Soviets yet even with their staggering losses.
East side action finds Alpha Bradley moving from Eisenbach to a better spotting position in the woods to call down heavy mortar fire from the M106 to the hunkered down T62s of the 33rd. Damn! They missed as well. 
However, the T62s didn’t and exacted their revenge with overwhelming fire power which completely obliterates the foolhardy Bradley (burning on the horizon in the woods)!  Now the M106 (right) is temporarily neutralized, that is until the HQ can move and get a better bead on the bad guys.  I doubt if he’ll leave the safety of Eisenbach though.
The 87th finally activates and races towards the finish line only to stop right at the edge.  Charlie’s 1st Infantry Platoon positioned in the woods (top right) was waiting for this exact moment and fires the Dragon aaaannnnd misses.  This depletes their ammo which means that two turns must pass before they can fire again. 
Charlie activates for the last time this turn and orders its 2nd Infantry Platoon on a desperate gamble: assault the enemy and stop them at all cost.  They're effort is all in vain.  They disorder the T55s at the cost to themselves. Turn 10, the Chit Draw gods smile upon the Soviets as the 87th activates first and promptly exit off the board for a costly Soviet win.

LinkWithin

Related Posts Plugin for WordPress, Blogger...